Interactive Session
As you run the simulation, you can run an interactive session on the board also known as debugger. Tweaks and watches go live while running the program on physical hardware.
Exercise #
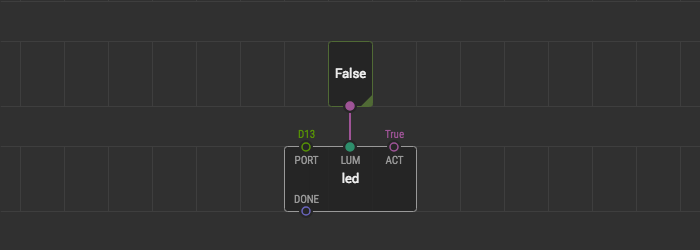
Let’s control our LED in real time.
-
Connect the Arduino board to your computer.
-
Upload the program with the interactive session enabled: hit Deploy → Upload to Arduino and check “Debug after upload”.
-
Once the interactive session has been started, select
tweak-booleanand change its value; see how the built-in LED on the board reacts to these changes.
To stop the interactive session press “Stop” button on the green panel above. To start the interactive session again, you have to re-upload the program.
👆 Shortcut #
Click the button with a bug icon in the deployment pane below. To quickly access the upload dialog with “Debug after upload” checked.
Debug protocol #
During interactive sessions XOD IDE and the board keep connection open and exchange with messages about value changes. These message are simple plain-text lines and you can see them in the Serial tab of the Deployment pane.
Click the funnel icon and make sure “Watched Values” is checked. To echo the messages to the log.