Loops
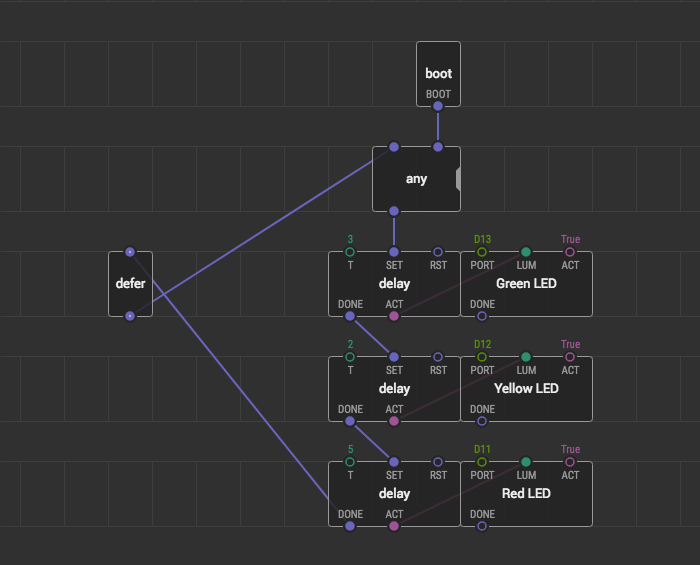
Let’s make a simple traffic light. Each light is activated by the delay node. When the latest one finishes it sends a pulse to the begining and our traffic light starts over.
To make the loop we need a special defer node. When defer node receives some value or pulse it postpones downstream nodes evaluation until the next transaction.
The defer node is always required when you make a loop to avoid deadlocks. For now, you can remember to place defer nodes right in the places where you want to complete a feedback loop. Read the guide to better understand the execution model.
Program begins with the initial boot pulse. Then each delay node triggers the next one. The latest one pulses back to the beginning, and it works continuously.
Exercise #
Let’s bring the button back and make the device start with the button press.
- Assemble a circuit according to the scheme.
- Replace
bootwith thebuttonnode and bind the correspondingPORTvalue. - Link with a free pin of the
anynode. - Upload the program.
Press the button to run the chain.