Terminals
We need a way for the between node to get values in and put values out. In XOD patch nodes interact with the outside world using terminal nodes. You can find the terminal nodes in xod/patch-nodes library, they are called input-number, input-pulse, output-boolean, etc.
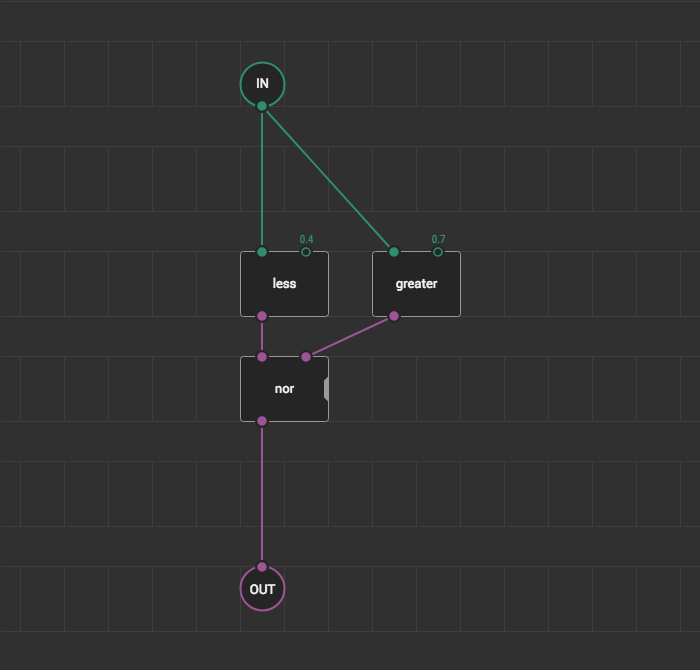
On this patch, we already placed an input-number and output-boolean instead of tweak-number and watch. The terminals give our node one number input pin and one boolean output. You can check it out by invoking the help box for the node in Project Browser.
Instructions #
- Reflect the changes to your
betweenpatch: copy/paste theINandOUTterminals there and link them accordingly. - Add two more
input-numbers. - Connect them to
lessandgreater’s pins instead of hardcoded0.4and0.7values. - Label the new terminals as
MINandMAXusing Inspector. - Check how the node looks now in the help panel.
Note that node’s pin order is determined by the order of respective terminals. Try to reorder the input terminals and look how it affects the preview in the help panel.
Pin naming convention #
Conventionally XOD uses pin labels that are similar to IC leg labels. The labels contain at most four characters, and usually, they are mnemonics or abbreviations. The restriction allows rendering patches quite densely.