Creating Nodes for XOD in XOD
The most straightforward way to create a new node in XOD is composing the new one from existing nodes. The process outline is:
- Create a new patch.
- Link few existing nodes together to implement a feature.
- Add input and output nodes so that one can adjust the node behavior and consume results.
- Done! Use the newly created patch as a node on other patches.
Because of the dual nature of the patches, nodes implemented this way are called patch nodes in XOD. They are patches and nodes at the same time.
The task #
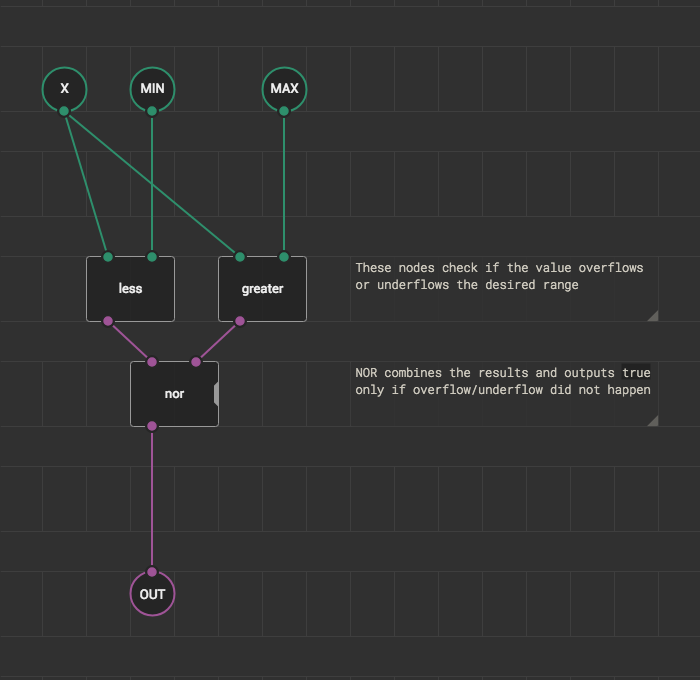
Let’s create a simple but handy node between which takes a number value, min/max limits, and outputs whether the value is between limits or not. I.e., it returns true if and only if the following is satisfied:
min ≤ value ≤ max
Make it work #
Let’s start with a test implementation on a single patch. Create a new project (File → New Project, or Ctrl+Shift+N), name it something like my-utils.
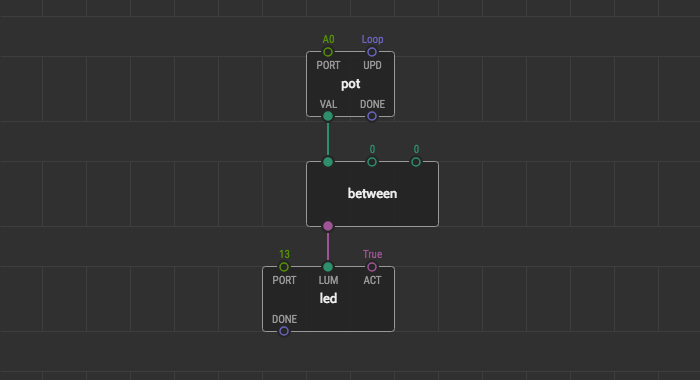
We’ll use a potentiometer as the data source, and a LED to observe the result. Say, we want to test if the value of potentiometer falls between 0.4 and 0.7 and enable the LED only if the test passes. Combination of xod/core/less, xod/core/greater, and xod/core/nor would do the job:
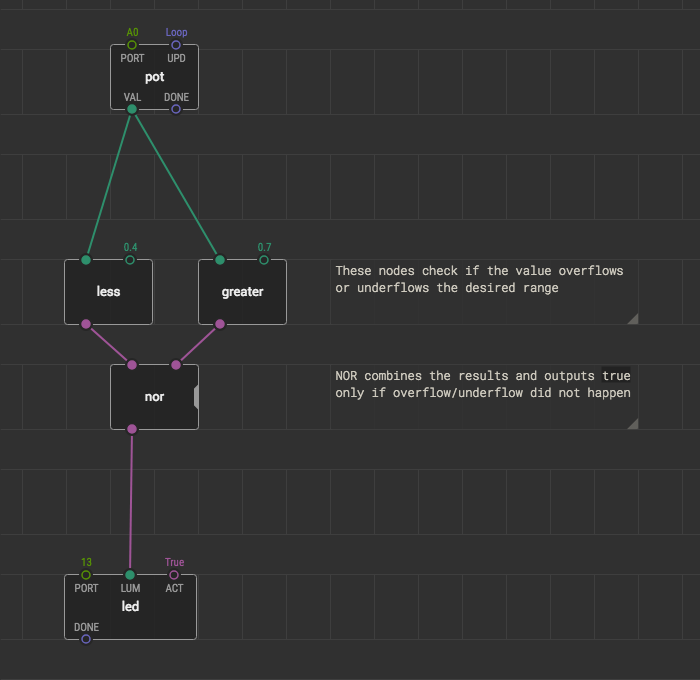
Upload the program, rotate the knob to verify all works as expected.
Create new patch #
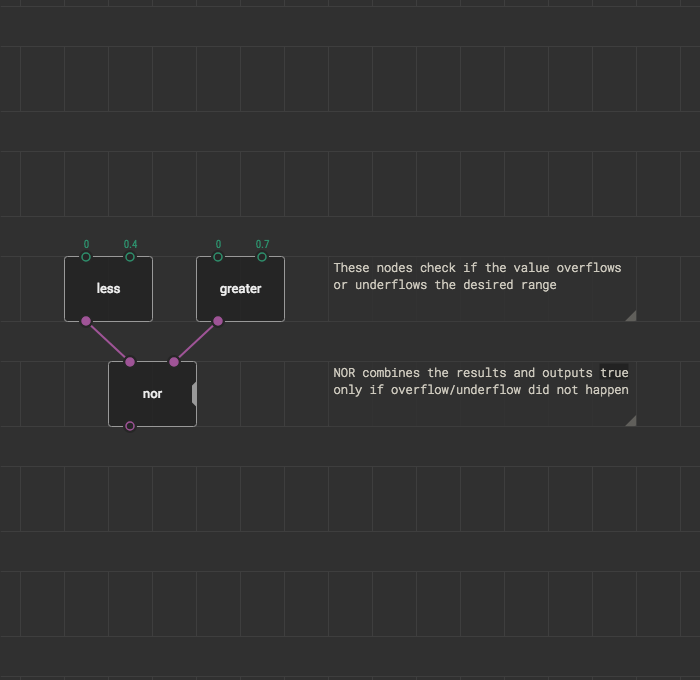
We’re ready to make the “between” check reusable. First, you need to create a new patch which will define the new node. Hit “File → New Patch” or Ctrl+N, enter between as the name. It will be used by XOD for node name as well.
Now move the less, greater, nor nodes from the main patch to the new patch. Use cut/paste (Ctrl+X/Ctrl+V) to done it.
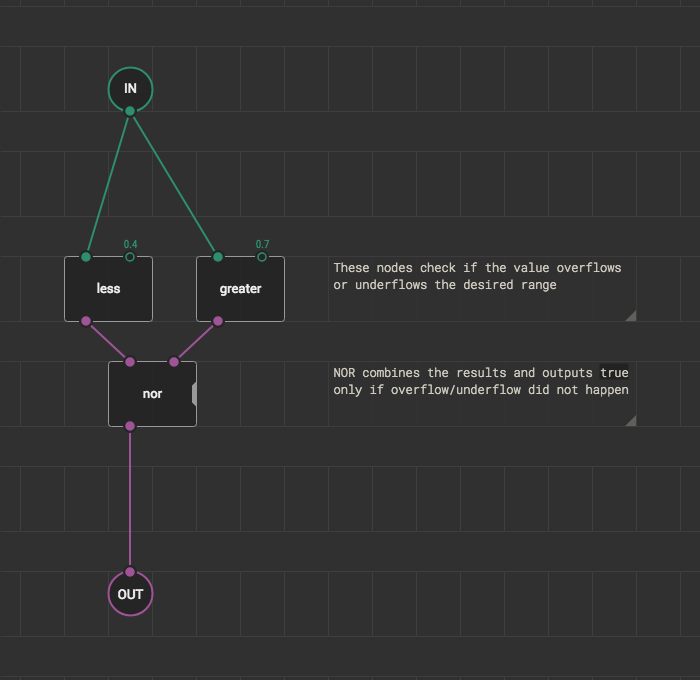
Add terminals #
Now, we need a way for the between node to get values in and put values out. In XOD patch nodes interact with the outside world using terminal nodes. You can find the terminal nodes in xod/patch-nodes, they are input-number, input-pulse, output-boolean, etc.
We are interested in an input-number and an output-boolean since we take an arbitrary number for comparison and output a true/false value. Add and link them like any other node. Note terminals are rendered as circles because they’re very special.
Use it #
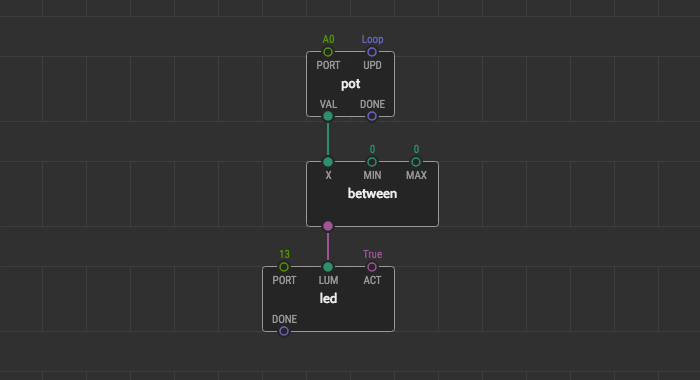
Switch back to the main. Drag and drop the between node there. Link it to the pot and led so that it acts as a medium.
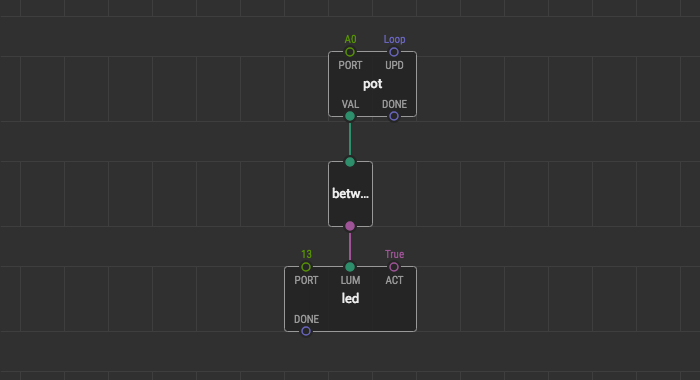
That’s all! The node is ready and works. Upload the modified version of the main patch to your board and verify our brand new node between really works.
Expose parameters #
We compare to hard-coded limits 0.4 and 0.7. Of course, a node user would desire to adjust the limit values depending on his task. Let’s make it possible. It is as easy as adding two more input terminals.

Look at the main patch now. Whoa! The between node has got two extra pins.
But which one corresponds to which terminal? In XOD nodes show their pins in the same order as their corresponding terminals are arranged along the X-axis. So here we have the value, min limit, max limit.
Add labels #
In most cases, it is a good idea to specify pin labels explicitly so no one would be confused. Pins get their labels from labels of their terminal nodes.
Open the between patch, select input terminals one after another and set their labels via Inspector.
How did assigning the terminal labels reflected in the main patch? Let’s see. Pin labels became much more clear and explicit.
If it would make you happier, move the X terminal between MIN and MAX and see how the order of pins on the node changes.
Conclusion #
Composing new nodes in XOD is not a big deal. Use it to make programs more clear, share functionality, and reuse your own past work.
The provided example is pretty basic. If you want to learn more, follow a guide to make an analog sensor driver node.