WS2812: Controlling NeoPixel RGB LEDs
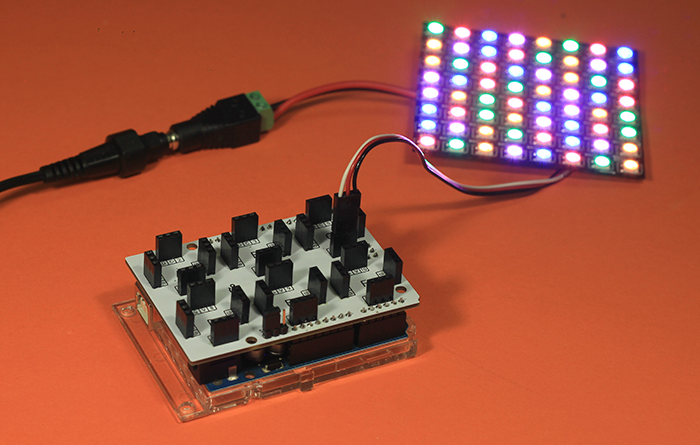
Arduino Uno fills 1024 RGB LEDs with a two-color pattern
WS2812 (also known as Adafruit NeoPixel) is an intelligent light source that combines RGB LED and a controlling chip in a single component. The components come in various forms and sizes but the principle is kept the same. The chip is receiving data over the one wire Din, takes the first bytes needed for itself, and passes the rest to the Dout pin. That makes it possible to daisy chain such LEDs into a long strip, or assemble into any form-factor like matrix, circle, or whatever.
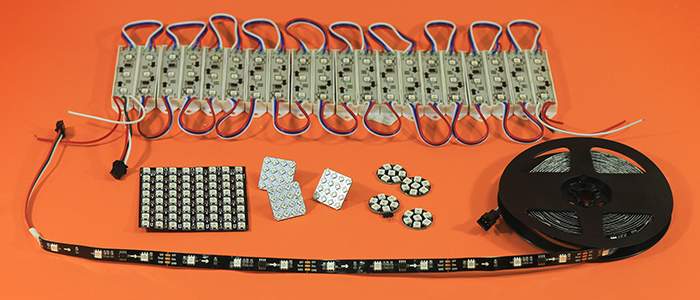
XOD offers a xod-dev/ws2812 library to work with NeoPixel LEDs.
Wiring #
To connect a chain of NeoPixel LEDs to a controller hook up three wires:
- Voltage (usually labeled as
V,Vcc,5Vor12V) goes to the plus of a power source. - Ground (
GorGND) goes to power source ground/minus and should be additionally connected to the controller board ground if powered from a separate power source. - Data input (
Din,D, orS) goes to any digital GPIO pin of the controller board.
Here is a very basic example of the WS2812 LED strip connection to Arduino Uno:
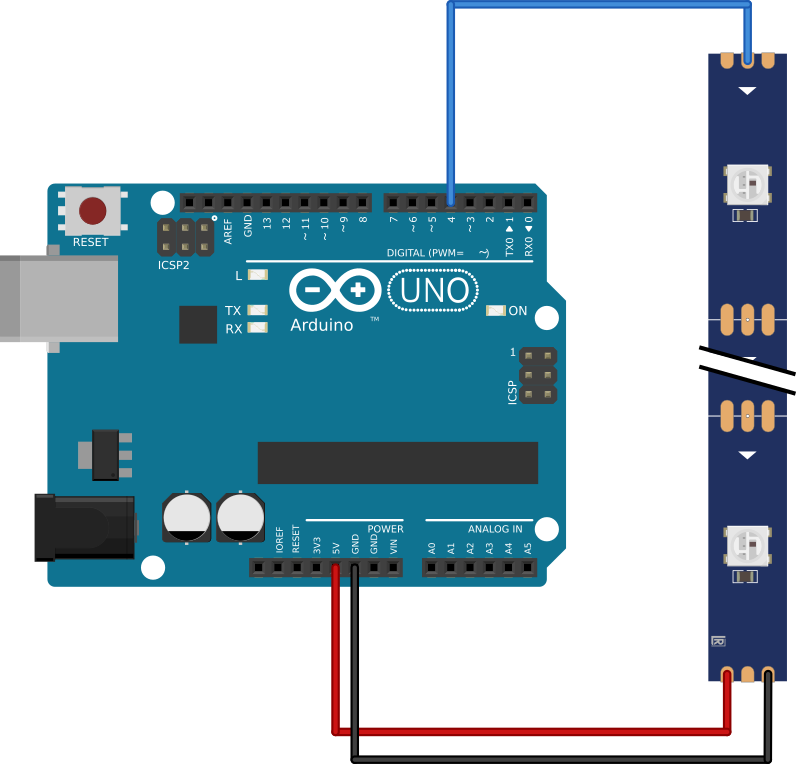
In this example, strips’ Vcc and Gnd pins are connected directly to the Arduino Uno. However, if you have a long strip (more than 16 LEDs), you have to power it up from an external power source. Moreover, if your strip is very long, you have to cut it in several places and solder additional power and ground wires and connect two parts of the LED strip: Dout and Din.
In our examples below, we’re using the 8x8 matrix. The data wire is connected to a digital pin D4 of Arduino Uno. The matrix is controlled exactly the same way as a strip. You might consider it a strip that is funky-twisted in ZZZZ-order. The matrix is powered up from an external source and then it powers the controller.
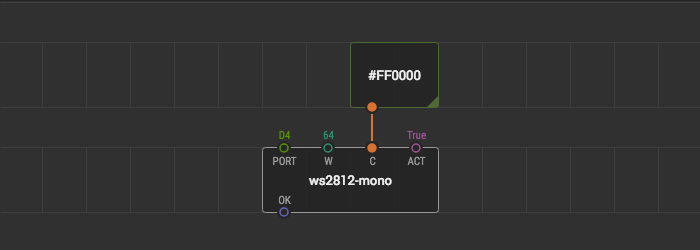
Solid color #
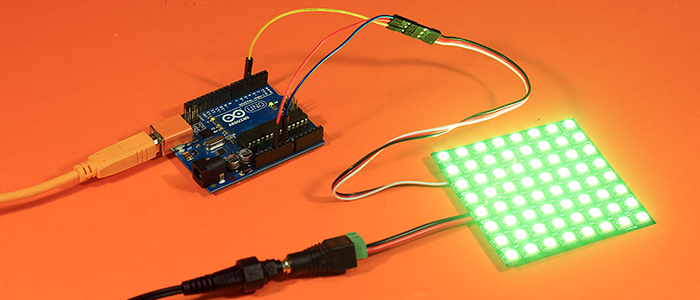
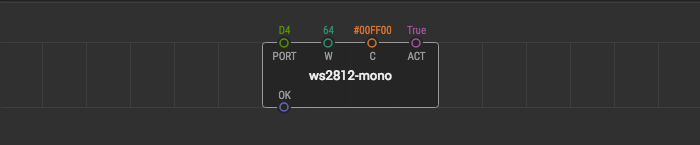
To fill the whole strip with a solid color there is a quickstart node ws2812-mono. Here is a step-by-step recipe:
- Place the
ws2812-mononode. - Bind the port.
D4in our case. - Bind the number of LEDs you have. In our case: 16.
- Bind any bright color to
C. In this example green #00FF00. - Upload the program.
Tweaking in real-time #
One of the powerful XOD features is tweaking and watching values right on the patch in the debug mode. Place a tweak-color node and link it to the C color pin.
After uploading the program with a debug mode turned on, select the tweak node, open the color picker in the inspector, and start dragging the hue handle to change the color value. You will see the LED strip changing the color in real-time.
Animating color #
Instead of choosing the color you can generate it using other nodes. For example, to generate a smoothly changing color, replace the tweak-color node from the previous example with a combination of xod/core/sine-wave and xod/color/color-hsl.
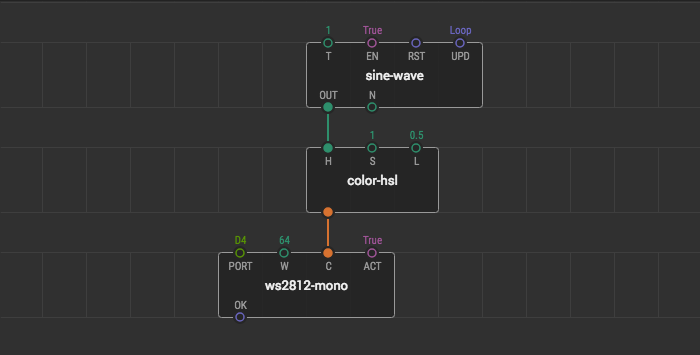
The sine-wave node generates a number that roams between 0 and 1 overtime. It controls the hue component of the color, so we get a smoothly changing color from red over all possible tones and then back. If you want to make something more complex, for example, light-music, you can make an audio analyzer node and replace the sine-wave node with it.
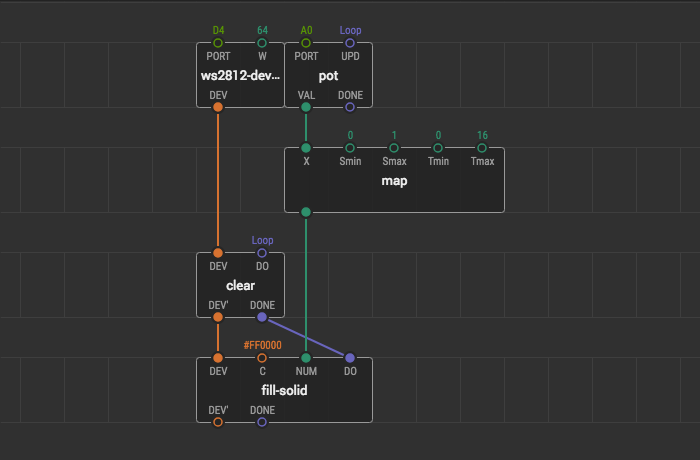
Bar gauge #
Imagine an LED strip that shows the potentiometer value. It fills the whole strip when it’s 1, half when it’s 0.5, and so on. To make a bar gauge, the library has no quick-start node but there are device- and action nodes that can be used to implement high-level tasks such as this one.
First of all, place ws2812-device and fill-solid nodes. Bind a port number and number of LEDs to the device node and any color you like to the fill-solid action node.
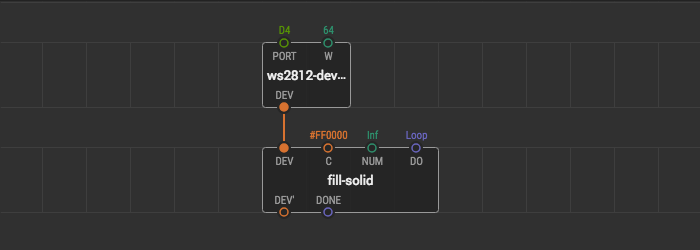
If you upload the program now, you’ll get the same thing as with the ws2812-mono node you have used before. But you might notice that the fill-solid node has a NUM pin. It’s a number of LEDs to fill up with a solid color. It’s time to add a potentiometer and map its values to the NUM pin.
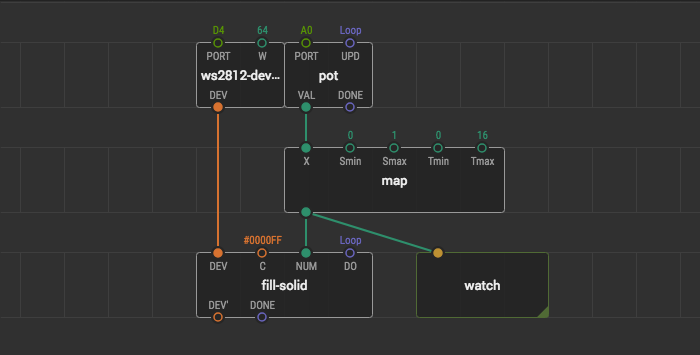
Now upload the program and rotate the knob. You might see no changes at all. The reason is we do not clear the LED strip from the previous values. So the program tries to color the specific amount of LED with the same color as before. Add a clear node, which will set the color of all LEDs to black and link its output pulse with the DO input of the fill-solid node.
Pattern #
The library also provides a feature to fill the LEDs with a repetitive pattern. The pattern type provided by the library represents a list of color values which define the 1D-image.
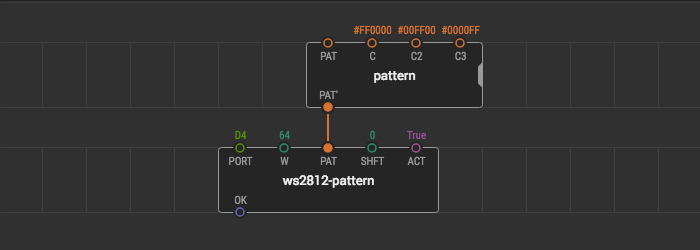
- Place a
ws2812-patternnode. - Place a
patternnode. - Expand the variadic node
patternand bind different colors. - Upload the program.
A pattern fill is only one of the possible ways to fill the LEDs with not just solid colors. However, it’s only one implemented way right now. Feel free to contribute.
Shifting pattern #
One of the ways to animate a pattern is to shift it. It might look like running dots, police lights, etc.
The ws2812-pattern node has a SHFT input pin, which contains the number of pixels to shift/wrap in the pattern. Wrapping means that if you have only 4 pixels in the pattern and you shift it for two, the last two pixels will become first two and vice versa.
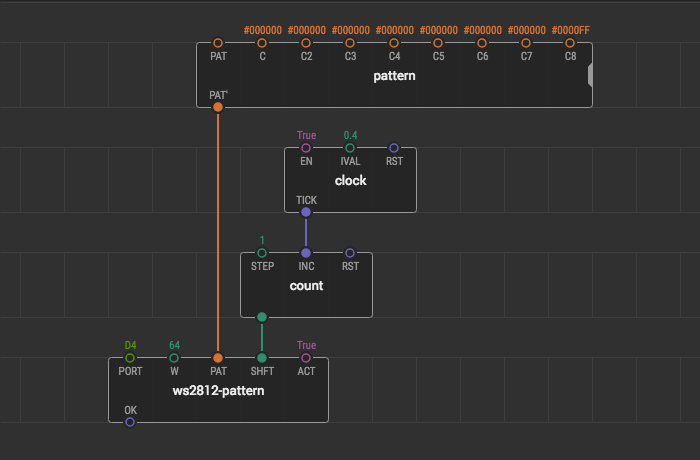
Here’s a recipe to make a crawling animation:
- Add a
clocknode to generate pulse signals with a specifiс interval. - Add a
countnode to increment the shift value. Link it with the clock to change the shift over time. - Link the output of the
countnode to theSHFTinput pin. - Upload the program.
If you do everything correctly you’d see a few dots crawling over your LED strip.
With the xod-dev/ws2812, you can control your NeoPixel devices with a considerable amount of LEDs using a controller like Arduino Uno. Only basic patterns are supported though. The timing restrictions of the WS2812 data protocol are strict. So if you need a custom behavior you have to implement a new node similar to fill-solid or fill-pattern in C++ or assembly. See their implementation as a starting point.