This page has no translation to 한국어 yet. The original English version is below. If you’d like to help, great! See how to translate a documentation page in the contribution guide.
Note
This is a web-version of a tutorial chapter embedded right into the XOD IDE.
To get a better learning experience we recommend to install the
desktop IDE or start the
browser-based IDE, and you’ll see the same tutorial there.
Run for X Seconds
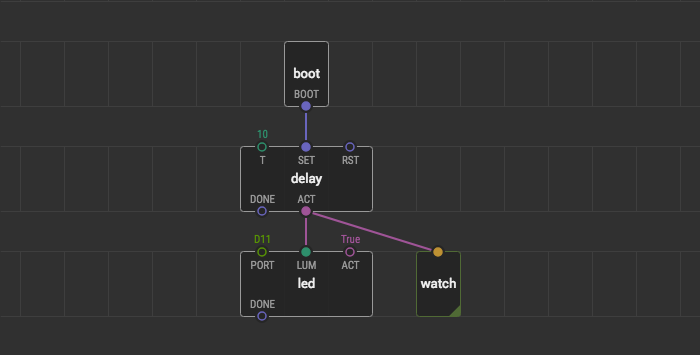
Here is a device that turns on the LED for ten seconds on boot.
The delay node helps us with this task. Generally, this node is used to postpone a pulse for some time, but when the delay node is activated it also outputs True value on the ACT pin. That’s what we need.
Exercise #
Let’s modify the device so that the LED turns on for three seconds on a button press.
- Replace
bootwith the abuttonnode and bind the correspondingPORT. - Link it with the
SETpin of thedelaynode. - Change the
Tvalue to 3. - Upload the program
Press the button and see how the LED behaves. Try to press the button many times while the LED glows and see how each press postpones the delay to be elapsed three seconds after the last press.
Additional excercise #
Combine a few delay nodes by chaining DONE and SET pins to get a custom pattern of the blinking LED. Use the or node to combine ACT values as necessary.